Quick start
- Open the editor and wait for the demo project to load.
- Import the video. Drop the file anywhere on the editor, or use File › Import. It appears in the Project panel.
- Make a sequence. Select the clip in the Project panel and choose File › New › Sequence From Clip. The sequence matches the clip’s size and frame rate, with the clip on the timeline.
- Cut. Use one of the methods below.
- Export. Choose File › Export › Media…. Export mode opens on H.264 MP4; press Export, keep the tab open while it runs, and the MP4 downloads.
Click on the timeline before using shortcuts, so key presses go to the editor and not to the page.
How do you trim the start and end?
Move the playhead to where the video should start and press Q: everything before the playhead on that clip is trimmed off and the rest slides left. Move to where it should end and press W to trim off everything after. These are Ripple Trim Previous Edit and Next Edit to Playhead, so no gap is left behind.
You can also drag the start or end of the clip on the timeline with the Selection tool, then close the gap.
How do you cut out a part in the middle?
Two ways, both ripple the rest of the video left so nothing is left empty:
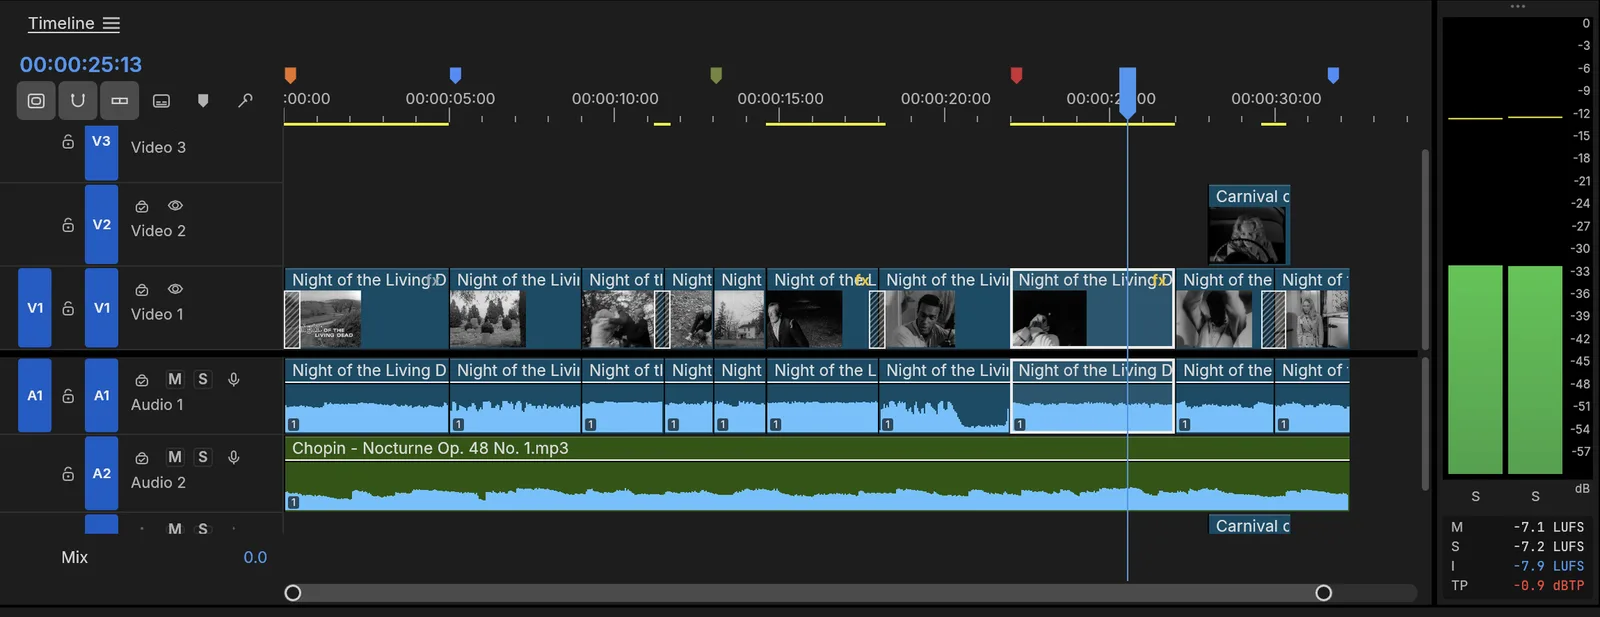
- In and Out marks. Put the playhead at the start of the part to remove and press I, move to its end and press O, then press ' (apostrophe) for Extract. ; (semicolon) is Lift, which removes the part but leaves a gap.
- Razor cuts. Press C for the Razor tool and click the clip at both ends of the part, or press ⌘K (Ctrl+K) to add an edit at the playhead. Select the piece in between with the Selection tool (V) and press Shift+Delete for Ripple Delete.
How do you export only part of a sequence?
Mark In and Out on the timeline around the part you want, open File › Export › Media…, and set the range to Source In/Out instead of Entire Source. Only that stretch is encoded.
Can you join several clips?
Yes. Import them all, then drag them from the Project panel onto the timeline one after another. Add a dissolve between two clips from the Effects panel’s video transitions, and the whole sequence exports as one MP4.
Tips
- Undo is unlimited. ⌘Z or Ctrl+Z steps back, and the History panel lists every step.
- Save the project with File › Save if you want to come back to the cut: it downloads an
.fcprojfile. While you work, the browser also keeps a recovery copy of unsaved changes. - Need captions too? The AI subtitle generator transcribes the sequence and adds a caption track; burn it in with the export.
- Coming from Premiere? Most of these keys are Premiere’s. See FilmCraft as a Premiere Pro alternative.
FAQ
Does trimming online upload my video?
No. FilmCraft runs in your browser and reads the file from your disk. Cutting and exporting happen on your device; the finished MP4 is a download.
Is there a watermark or a length limit?
No watermark, no account and no length limit set by the app. Long or 4K files are limited by your computer: the browser build is single-threaded and keeps exports in memory until they download, so very long exports are better in the desktop app.
Can I cut a video without re-encoding it?
No. FilmCraft exports by rendering the timeline and encoding it again with its own H.264 encoder. That is what lets you combine clips, add transitions and titles, and change the frame size.
Which files can I trim?
MP4 and MOV (H.264, HEVC, ProRes, DNxHR, VP9, AV1), WebM and Matroska, MXF and MPEG transport streams, among others, plus audio files such as WAV, MP3 and AAC. Phone and camera files are less tested than standard test streams, so check the result before you delete the original.